2024 Toyota Corolla Tailgate Sound Deadening: Simple DIY Upgrade
After treating the doors, trunk and hood of my 2024 Toyota Corolla Touring Sports, there was one more large panel at the rear of the car that seemed worth looking at — the tailgate.
The tailgate already had some factory trim and insulation, but underneath the plastic panel there was still a fairly large lightweight structure that could vibrate and resonate. Since I already had leftover damping and foam material in the garage, I decided to treat the inside of the tailgate as well.
This was a much smaller project than sound-deadening the doors or trunk. I was not expecting a dramatic reduction in cabin noise, but the tailgate is a large panel directly behind the passenger compartment, so reducing some vibration and plastic-panel resonance seemed worthwhile.
The job was simple: remove the interior tailgate trim, add damping material to the accessible areas, add some soft insulation to the plastic trim panel, and put everything back together.
I Also Wanted to Add Corrosion Protection
Sound deadening was not the only reason I wanted to remove the tailgate trim. I also hoped to use the opportunity to add some extra corrosion protection inside the tailgate.
A few months after sound-deadening the doors, I upgraded the speakers to Hertz and used Bilt-Hamber Dynax S-50 cavity wax inside the door cavities while everything was already apart. I wanted to do something similar in the tailgate.
There was a good reason for that. My older Kia Ceed developed significant rust around the rear hatch area, so that experience made me much more interested in protecting hidden cavities before corrosion ever becomes visible from the outside.
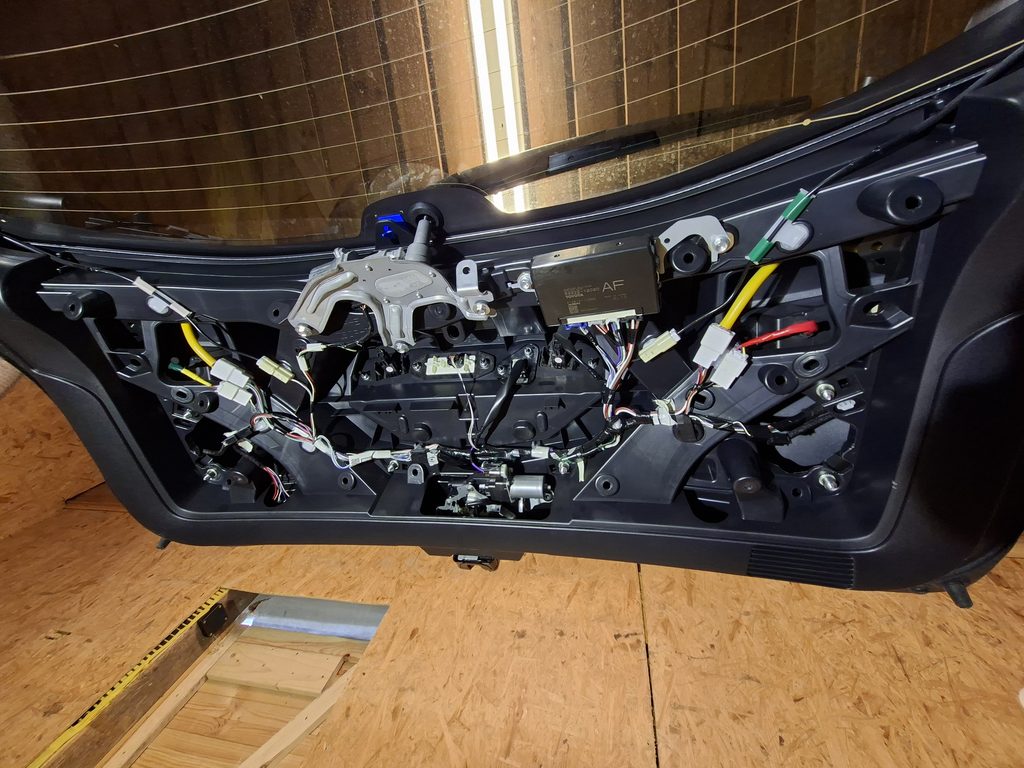
Unfortunately, once I removed the Corolla tailgate trim, I discovered that access to the outer metal skin was extremely limited. Most of the inner area is covered by the tailgate structure, wiring, mechanisms and a large internal panel, and I could not find a practical way to reach the cavity behind the outer skin well enough to apply the wax properly.
Rather than spraying corrosion protection blindly into areas I could not inspect, I decided to leave that part alone and concentrate on the sound-deadening treatment I could actually access.
Treating the Tailgate Trim Panel
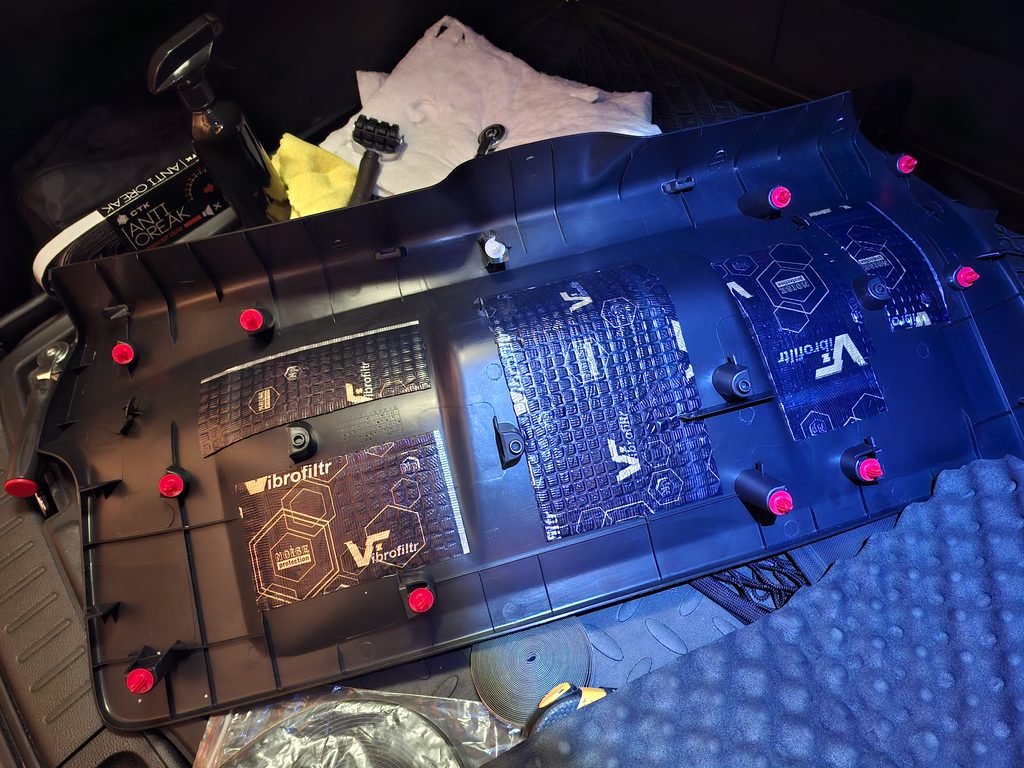
I started with the large plastic interior trim panel. Like many lightweight plastic panels, it can flex and vibrate, so I added several pieces of vibration-damping material to the larger flat sections.
I did not try to cover the entire panel. The goal was simply to add some mass to the areas most likely to resonate while keeping all clips, mounting points and openings clear.
This is also an area where using smaller leftover pieces works perfectly well. Full coverage would add unnecessary weight, while a few strategically placed damping patches are enough to make the panel feel more solid when tapped.
Adding a Soft Insulation Layer
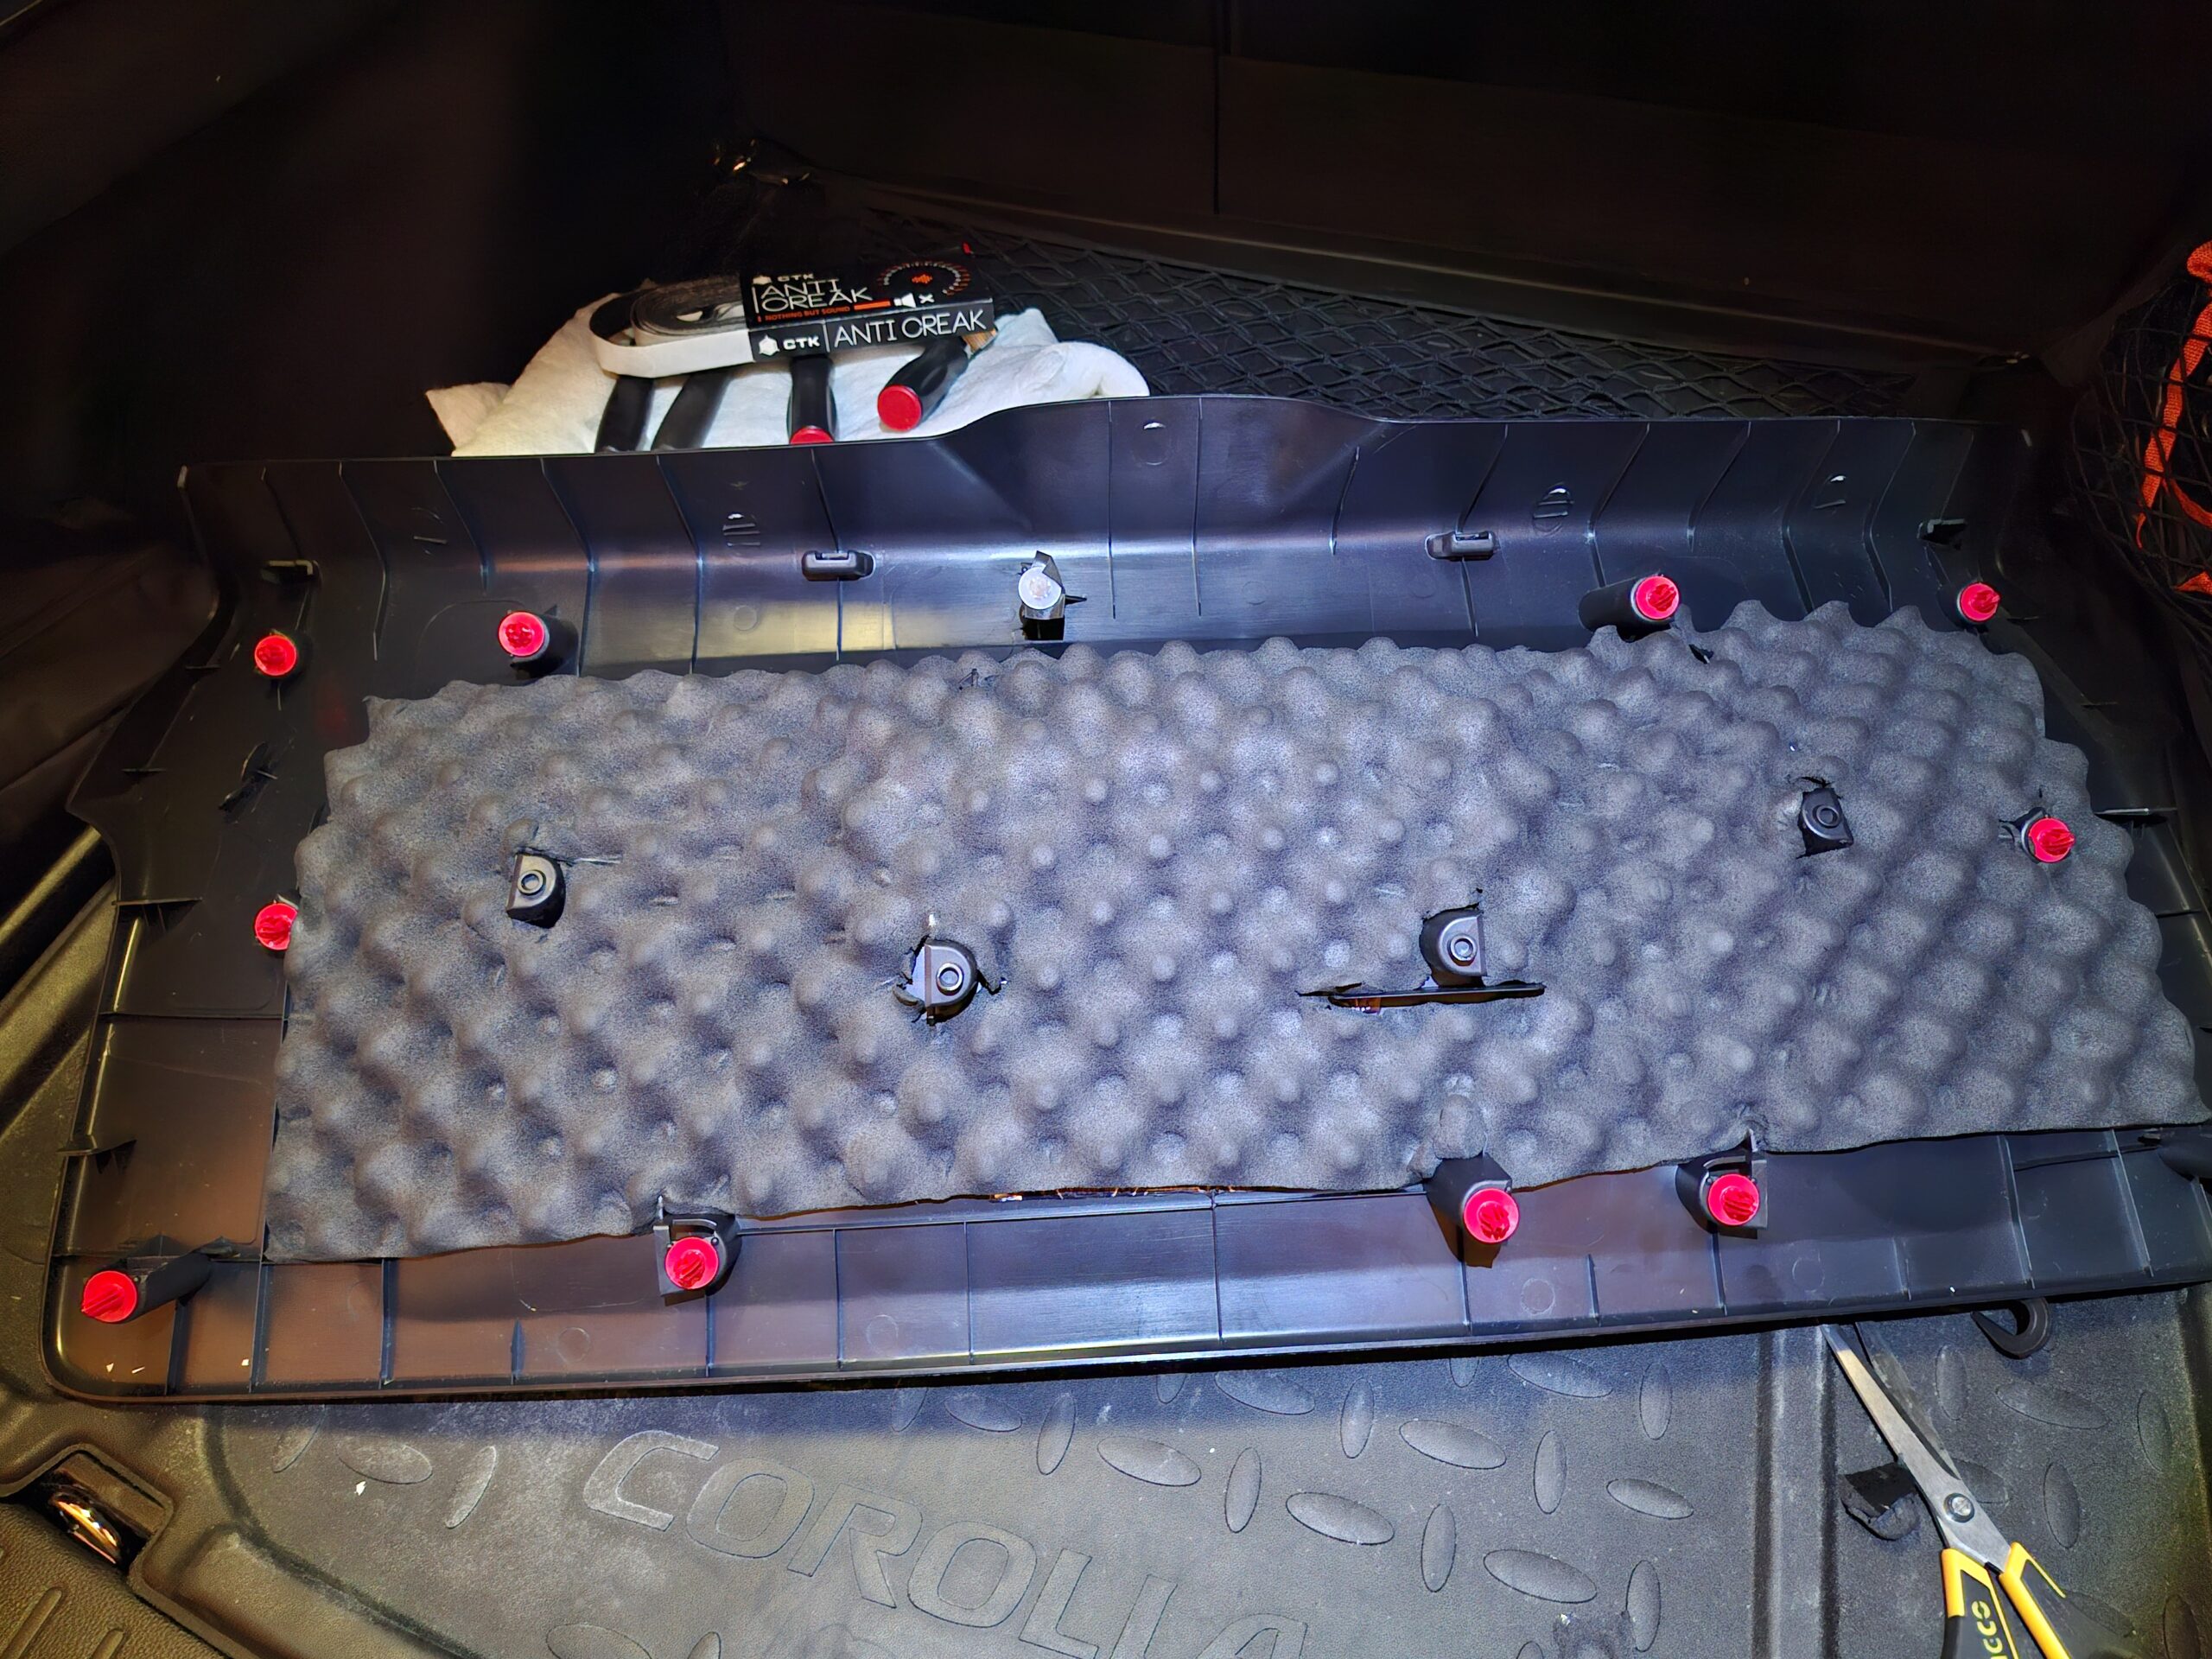
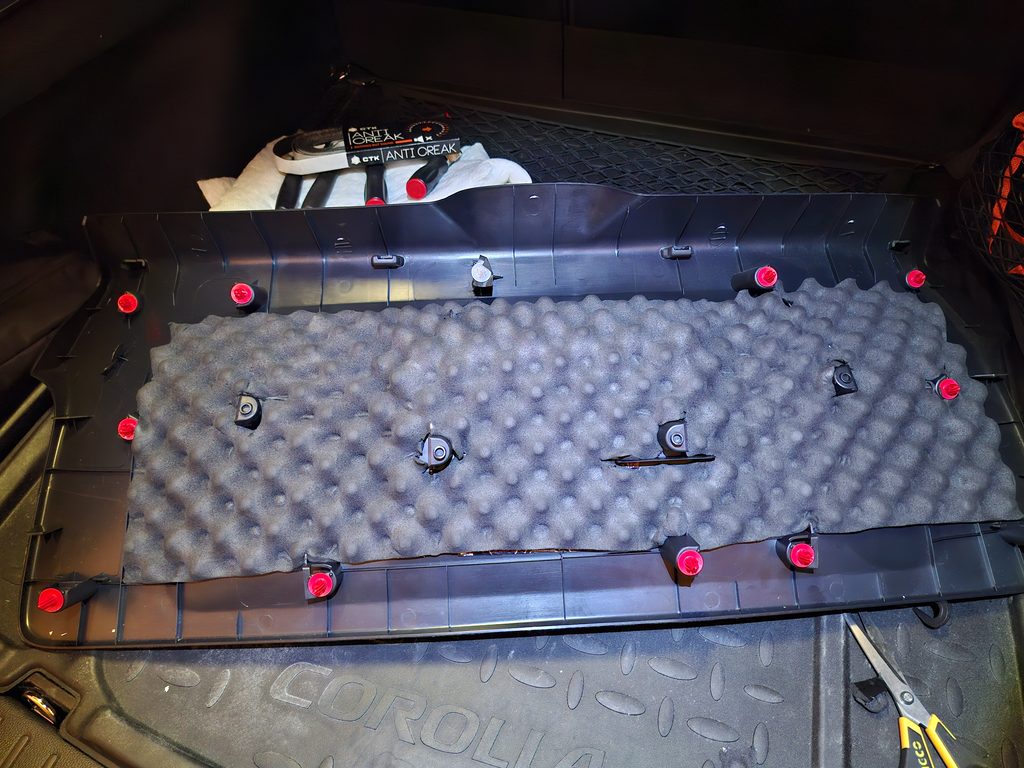
After applying the damping material, I added a layer of soft acoustic foam to the inside of the trim panel.
I already had a piece of this foam in the garage that was roughly the right size, so I decided to use it here. I also had larger pieces available, but I did not think covering every edge of the tailgate trim would make a meaningful difference for this particular job.
The foam serves a different purpose from the vibration-damping material. Instead of adding mass to control panel resonance, it helps reduce contact noise and vibrations between the plastic trim and the metal structure of the tailgate.
My goal was simply to cover the main central area where the trim had the most room to vibrate. I was not trying to achieve complete coverage, and I kept the clips and mounting points clear so the panel could be reinstalled normally.
I also managed to break one trim clip during disassembly — just like when I was working on the trunk. That was another reminder that it is always worth having a few spare trim clips ready before starting this kind of job. In the photo below, the replacement clip is the white one, while the original factory clips are red.
Since this was already a relatively small sound-deadening project, I preferred to use the material I had rather than add extra layers simply for the sake of achieving full coverage.
Was It Worth It?
From a sound-deadening point of view, I cannot say that this modification made a noticeable difference inside the cabin.
In fact, sound reduction was not even the main reason I originally removed the tailgate trim. I was more interested in gaining access to the inside of the tailgate so I could apply Bilt-Hamber Dynax S-50 cavity wax, especially after dealing with rust in the rear hatch area of my older Kia Ceed.
Once the trim was removed, however, I discovered that access to the outer metal skin was much more limited than I expected, so I decided not to spray cavity wax blindly into areas I could not properly inspect.
Since everything was already apart and I had leftover vibration-damping material and foam in the garage, I decided to add some insulation while I was there.
Did it make the cabin noticeably quieter? Honestly, no. I could not hear any clear improvement after the job.
I still do not regret doing it because the additional material cost me practically nothing and the trim was already removed. But if your only goal is reducing cabin noise, I would not remove the Corolla tailgate trim specifically for this modification and expect a major improvement.
In my experience, sound-deadening the doors and trunk made a much more noticeable difference.